|
The
original new aviary design had called for removable panels
to be mounted to the back wall. Perches would be screwed
to these panels. They could be removed by removing the
panels. When we changed the design of the aviary to include
permanent walls, we had to find another way to mount the
perches.
We
could have just screwed the manzanita branches to the
walls before attaching them to the aviary, but this was
not an ideal arrangement. First, it would be harder to
mount the walls with the perches attached. Second, we
would never be able to add or remove perches. Third, screw-on
perches can gradually become loose, allowing them to turn
and fall into positions that might not be desirable (this
applies mainly to branched perches, which ideally are
arranged so that none of the branches are on top of the
others). Without having access to the other side of the
wall, we would never be able to tighten these perches.
After
experimenting with various hardware configurations, we
finally found one we thought would work. The following
supplies are necessary (remember, click the image to enlarge
it):
|
|
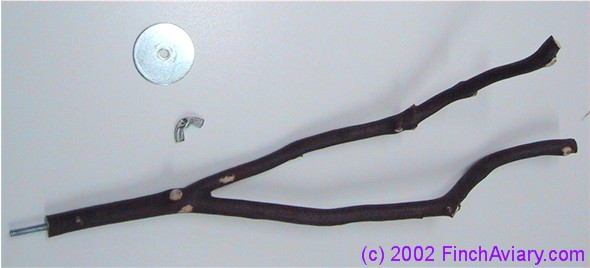
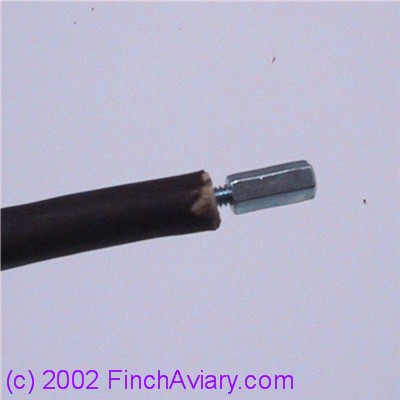
First
you need a perch that attaches to the wall via an
attached bolt. These perches should come with a washer
(actually, two washers, but we only need one of them)
and a wing nut, shown in the above picture. |
|
|
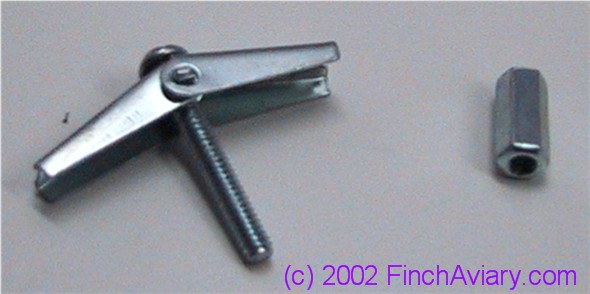
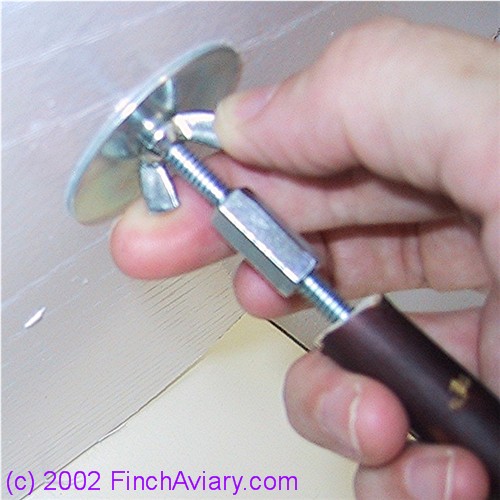
In
addition to the hardware that comes with the perch,
you need a toggle bolt and this neat tube-like piece
of hardware that looks like a very long nut, I'll
call it a coupling until I find out differently. It
basically allows two bolts to be screwed together,
one at each end. The toggle bolt will probably come
with very long (4") bolts. We replaced these
bolts with smaller bolts - just longer than the length
of one side of the hinge. |
the
following procedure was followed to attach the perches
to the aviary walls. I've included pictures of each step.
These pictures were taken using a small trial piece of
wood so that you will be able to see what is happening
on the other side of the wall (something impossible to
see when the perches are attached to the real aviary walls).
Note that this piece of wood is quite damaged, as it was
used in many experiments while we were trying to find
the perfect setup. I apologize for the poor quality of
these photos. My old point and shoot camera did not do
very well with close-ups.
|
|
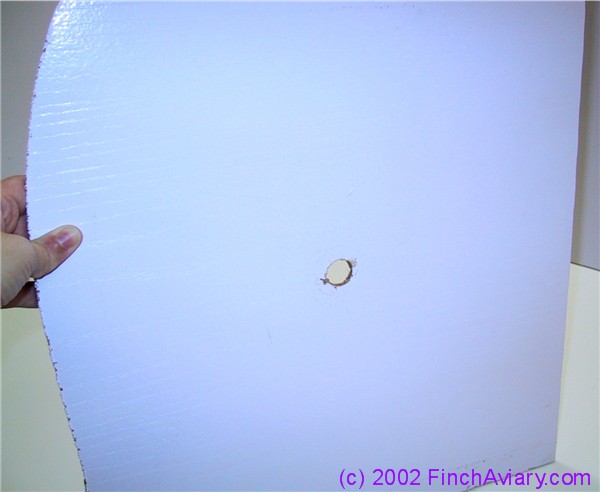
Step
1:
Drill a 1/2" hole in the wall where
you want to mount the perch.
(Note:
the toggle bolt instructions should tell you the
appropriate hole size for the size of the toggle
bolt. You need to make sure the hole size is significantly
smaller than the washer that came with the perch.)
|
|
|
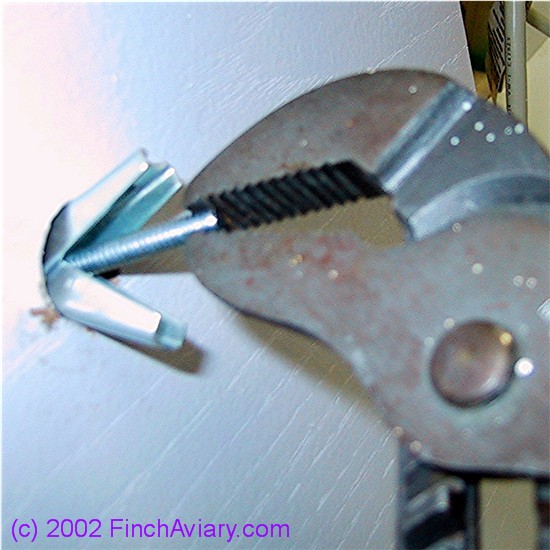
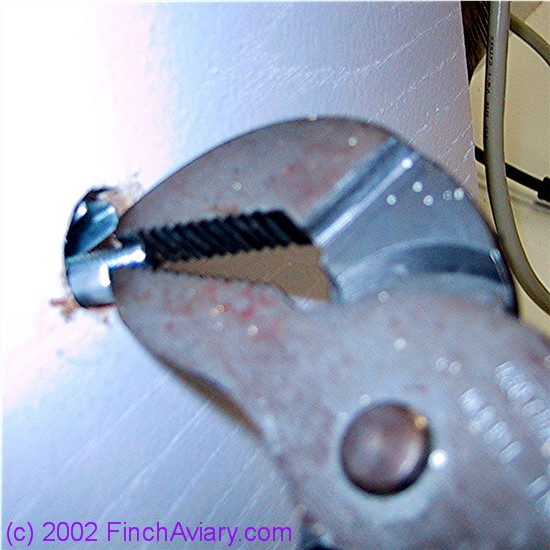
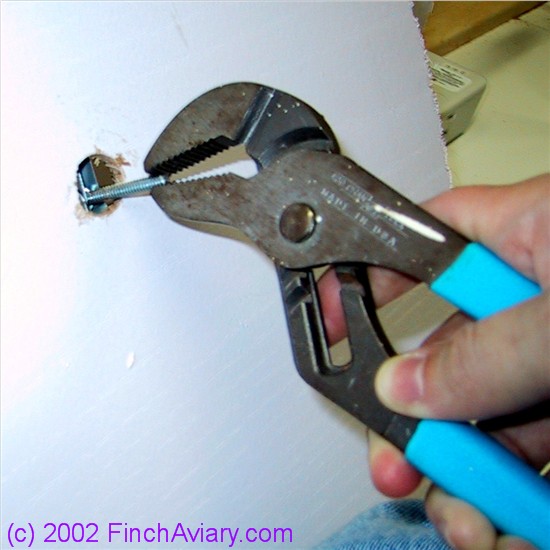
Step
2: Grasp the
end of the toggle bolt with a pair of pliers. Be certain
you have a good grip, because if you drop the bolt,
it will fall behind the wall and be lost. Begin inserting
the toggle bolt into the hole in the wall. The hinged
portion will begin to fold inward to allow the bolt
to slip through the hole. |
|
|
Continuing
to insert the toggle bolt. |
|
|
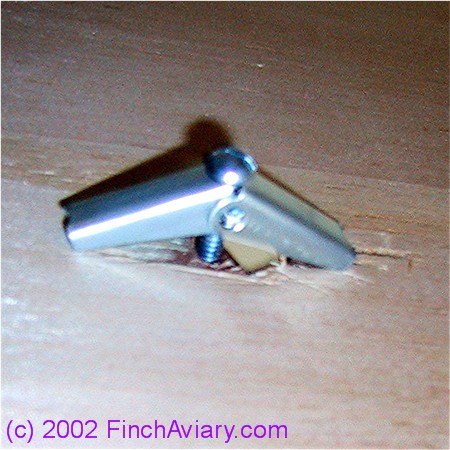
Step
3: When the
hinge portion is all the way through the hole, pull
back on the bolt as far as it will go, so the hinged
portion of the toggle bolt is brushed against the
wall. |
|
|
What
the hinged portion of the toggle bolt would look like
on the other side of the wall. |
|
|
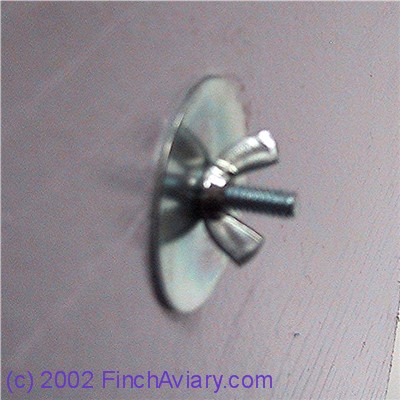
Step
4: Place the
washer that came with the perch on the toggle bolt
and then attach the wing nut. Tighten the wing nut
until the screw does not turn easily, but do not tighten
all the way just yet. |
|
|
When
the wing nut is tightened, the toggle bolt hinge should
end up lying snug and flat against the back side of
the wall. If you could see it, it would look something
like this. |
|
|
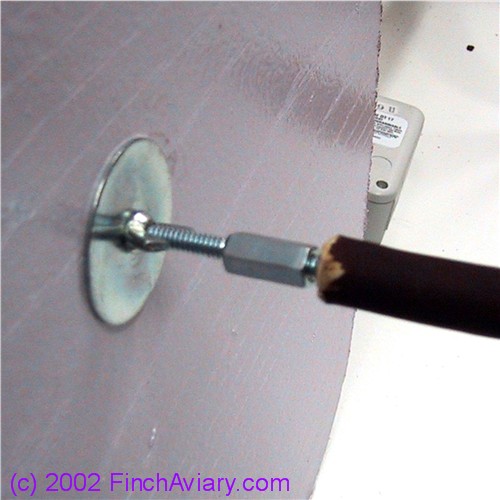
Step
5: Screw the
coupler onto the bolt on the perch. |
|
|
Step
6: Position
the perch such that the toggle bolt and the perch
bolt are in line. |
|
|
Step
7: Turn the
coupler clockwise to attach it to the toggle bolt.
Try to ensure the toggle bolt and the perch bolt meet
at approximately the middle of the coupler. Turn the
coupler and the perch until the fit between the perch
and coupler is very tight. It is okay if the toggle
bolt will still turn through the hole in the wall,
but the toggle bolt, coupler, perch connection should
be tightly joined. |
|
|
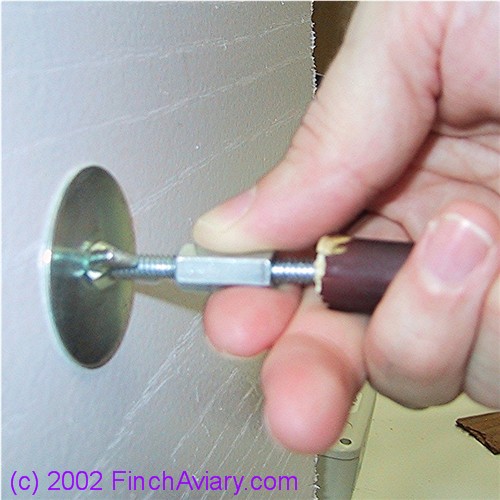
Step
8:
Turn
the perch clockwise until it is positioned the way
you like it (the whole arrangement should turn --
toggle bolt, coupler, and perch -- as one unit). If
it will not turn, loosen the wing nut a little. Note
that when you have it positioned the way you like
it, the connection between the perch and the coupler
should still be tight. |
|
|
Step
9: Tighten
the wing nut. This will prevent the rotation of the
toggle bolt from moving, fixing the perch in the proper
position. |
|
|
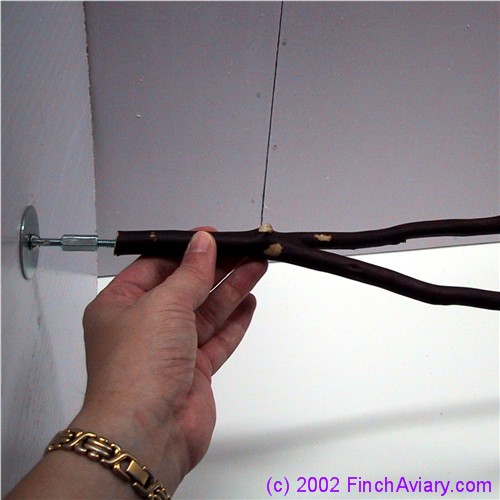
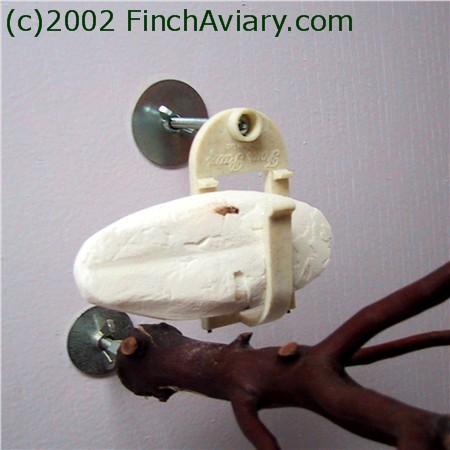
The
finished perch, mounted and tightened in this position.
If the perch becomes loose, it can be tightened again
easily by tightening the connection with the coupler
and by tightening the wing nut. If you want to remove
the perch for cleaning, it can be unscrewed at the
coupler, cleaned and replaced. Or, a different perch
can be attached to the toggle bolt if you want to
change the look of the aviary. |
On
the whole, this method has worked pretty well. From time
to time, a perch comes loose and needs tightening. Sometimes,
after tightening, the perch no longer is positioned how
I like it and I have to loosen the wing nut and readjust.
It's not a perfect solution, but it works.
In
addition to manzanita perches, we also installed a plastic
clothesline swinging perch, bird sundecks for sleeping
quarters, and a Sandy Perch to help keep nails trim. Because
I don't like the tiny plastic perches that are included
on most cuttlebone holders, I removed the perch and inserted
a togglebolt where the perch would go. I then mounted
the cuttlebone holder upside down at one of the regular
perches.
|
|
Clothesline
Perch |
|
|
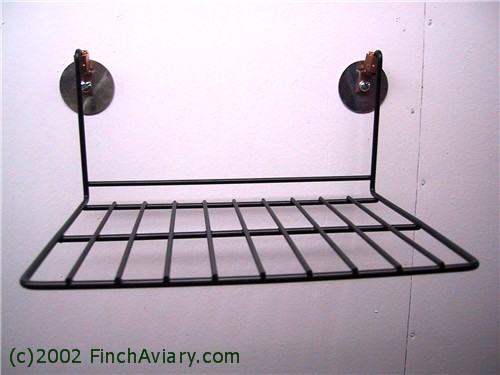
Bird
Sundeck |
|
|
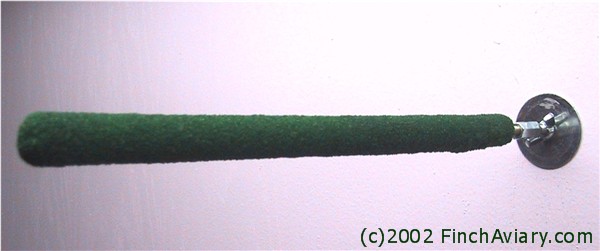
Sandy
Perch |
|
|
Cuttlebone
holder |
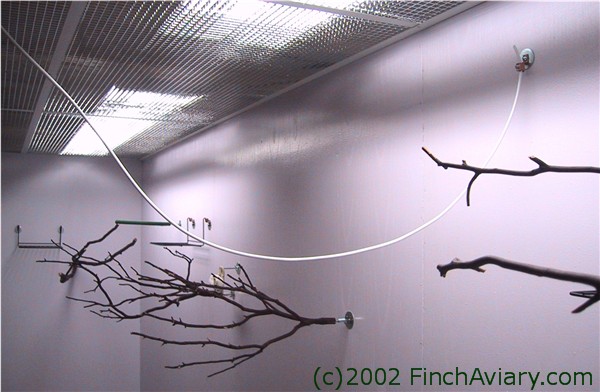
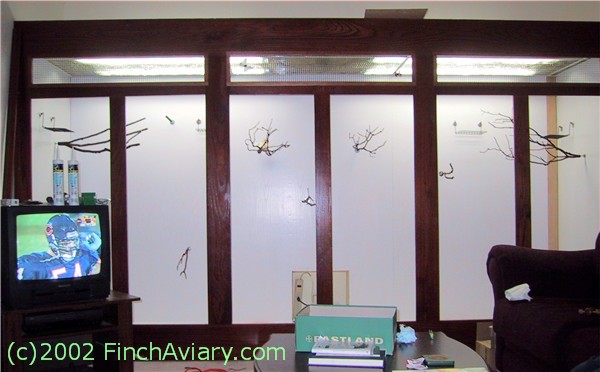
When
all the perches were mounted, the aviary looked like this:
Note
that there are three lower perches positioned at a sloped
angle leading up to the other branches. These are provided
to help older, injured, molting, or other flight-challenged
birds to get up into the upper branches. Also note that
great lengths were taken to avoid positioning one perch
on top of another. There is also enough space allotted
between many of the perches to promote flying, rather
than hopping. And the top 1.5 feet are left open for free
flight.
UPDATE:
The Sandy Perch was replaced with a fir perch similar
to the manzanita perches because it became very difficult
to keep clean, even after intense scrubbing, soaking,
and washing in the dishwasher. I had hoped it would cause
a reduction in the frequency of nail trimming, but I didn't
really notice any difference.
|