|
Finally,
the aviary was pretty much completed. The only things
remaining were the little details that would make the
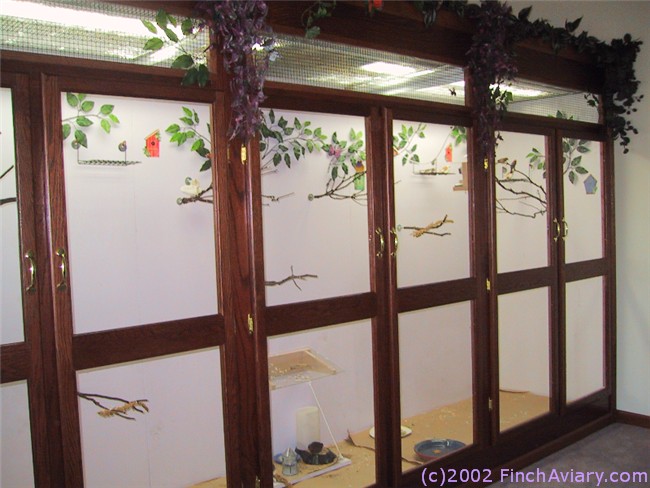
aviary a more inviting place. First, the outlet door was
created by screwing a spare piece of painted wood to the
wall, covering access to the outlet and extensions cords.
Attached to the outlet door was the platform that would
hold the seed and water dispensers. The platform was designed
to fold up on a hinge. Clothesline cords held the platform
a short distance above the aviary floor, so the kraft
paper could be easily slid out from underneath every day
without needing to move anything on the platform. Because
this platform was located below perches, we installed
a Plexiglas canopy to protect the food from droppings.
Our original design had this platform against the outside
wall, but by putting against the back wall we were able
to contain most of the spilt seed and seed husks to the
inside of the aviary.
Another
platform was installed in one corner to hold the quail
sandbox. We decided to hold off on installing the other
platforms for the time being because we currently have
no need for them.
(Remember,
click on any image to enlarge it!)
|
|
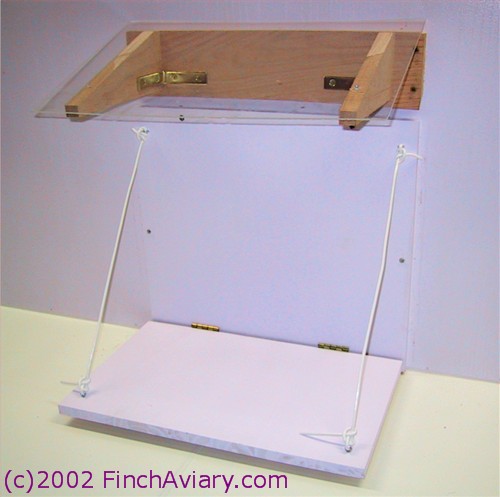
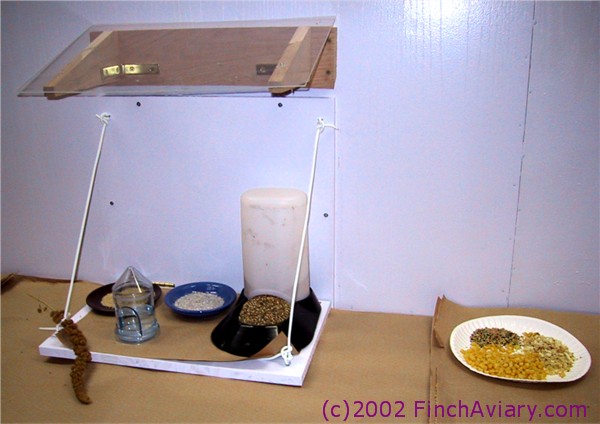
The
outlet door and the platform for the seed and water
dispensers. A Plexiglas canopy protects the food from
droppings. |
|
|
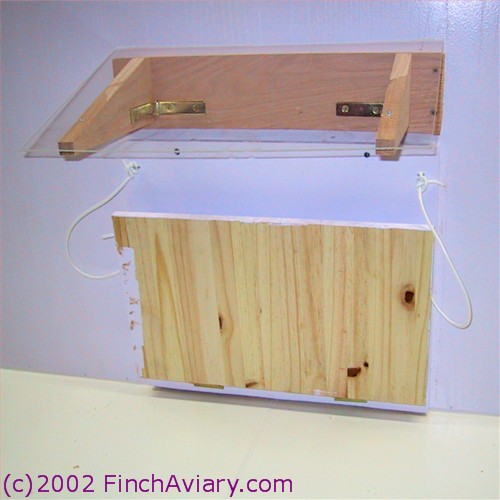
The
platform was installed on hinges so that it could
fold up for cleaning beneath it. |
|
|
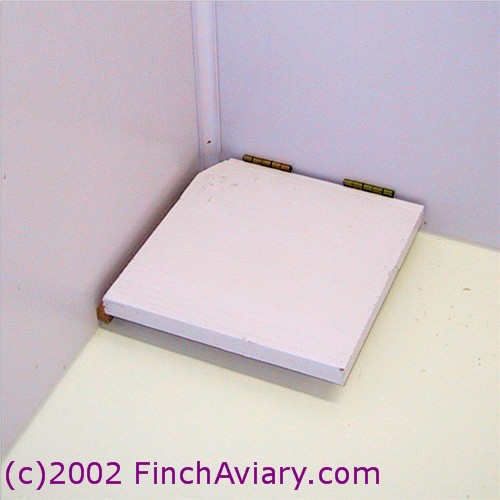
A
platform was installed in the corner for the quail
sandbox. This platform is not located directly below
any perches. |
|
|
This
platform also folds up for easy cleaning of the floor
beneath it. |
|
|
The
platform in use. Fresh food is placed to the side,
in a location not beneath any perches. |
Instead
of using millet holders, which I find frequently do not
hold the millet well, I attached the millet to select
perches using twist ties. Greenery was added inside the
aviary to give it a warmer and livelier atmosphere. I
used branches removed from a silk ficus tree and stapled
them to the walls with a staple gun. The branches were
attached above the perches and I made sure they were secured
to the wall so that the finches could not land comfortably
on them (so that they would not be as likely to become
soiled with droppings). I added craft butterflies to some
of the branches and attached Wallies wallpaper cut-outs
in the shape of birdhouses to the walls near the silk
branches. Suddenly, the aviary seemed full of warmth.
|
|
Millet
was attached directly to the perches with twist
ties.
|
|
|
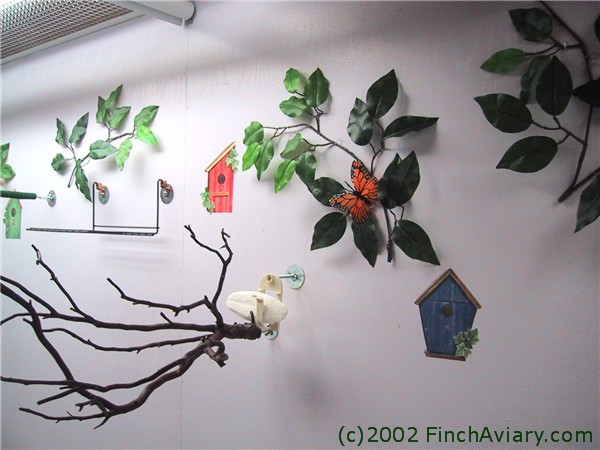
Silk
branches, craft butterflies, and Wallies wallpaper
cutouts finished out the aviary. |
|
|
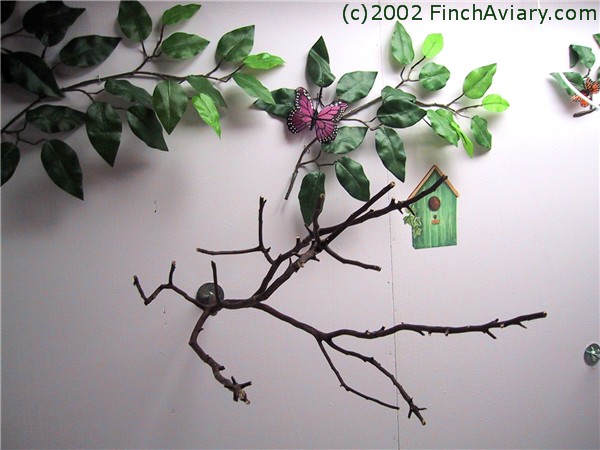
Another
view of the greenery. |
|
|
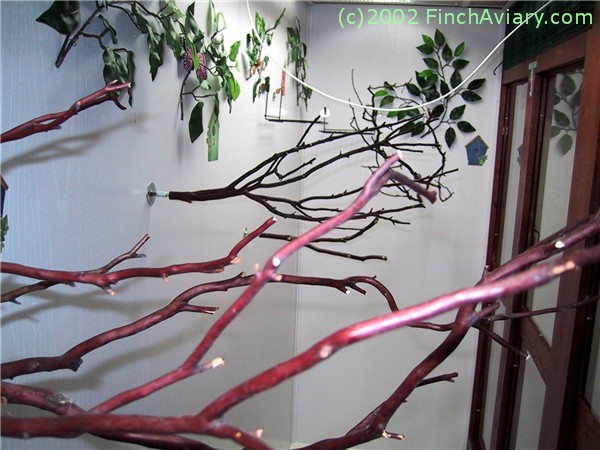
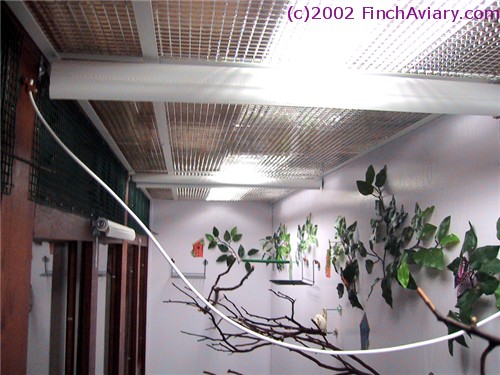
Bird's
eye view through the aviary. |
Shades
were
then installed, dividing the aviary in thirds so that
I could section off the area I am cleaning so that the
birds cannot enter. In addition, a shade was mounted over
one of the center doors so that I can pull it down 2/3
of the way when I have someone come in to feed the birds
for me (eg, when I am on vacation). I find people are
more comfortable opening the doors if the top of the doorway
is covered, even though I rarely ever have any escapees.
|
|
Shades
divide the aviary into thirds to keep the birds
out of the section I am cleaning.
|
|
|
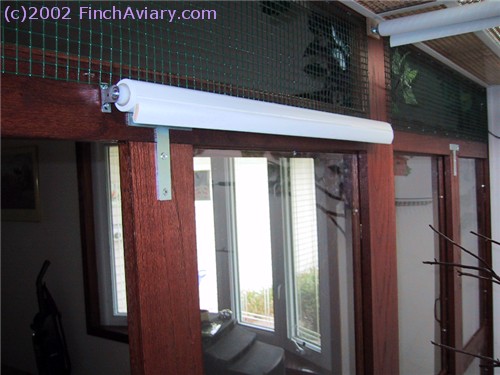
A
shade was mounted over one of the doors, to make it
easier for others to provide fresh food and water
when I am gone. |
|
|
The
door shade, pulled down to make it easy to swap food
and water containers in and out. |
|
|
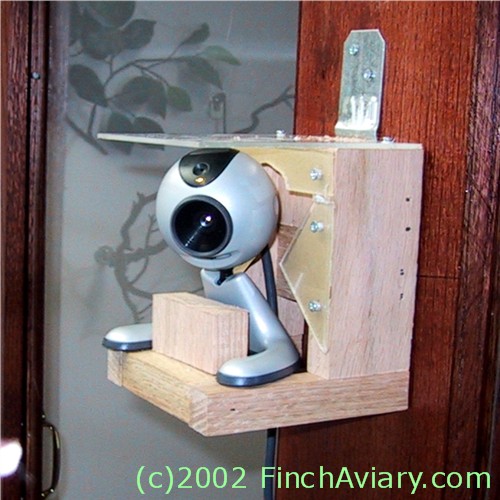
Finally,
the webcam was attached to the aviary front and wired
to go! |
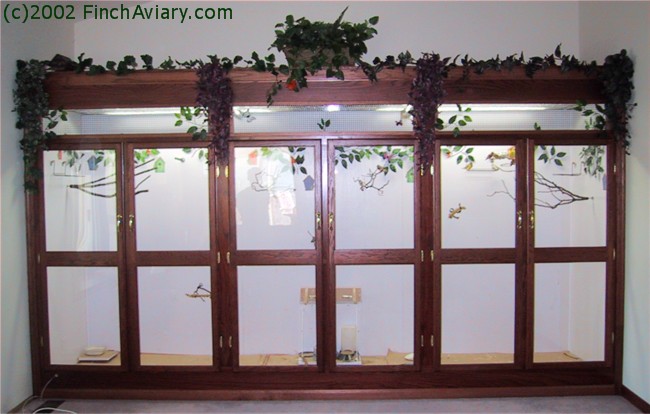
Finally,
greenery was added outside the aviary, and it was ready
to welcome the birds!
UPDATE:
Silk
Butterflies - most of the silk butterflies did not last
very long in the aviary. The birds found it fun to tear
their wings to shreds. However, the ones on the outside
of the aviary, attached to the ventilation panels are
still thriving ;) !
Webcam
- TeVeo, the company that created the webcam software
I used to use, is no longer in existance. The software
still worked, but it was constantly trying to connect
to TeVeo's site, which is no longer there. For this reason
as well as others, we decided to upgrade to a network
camera, the Axis 205. This camera now replaces the logitech
camera shown above.
|