|
We
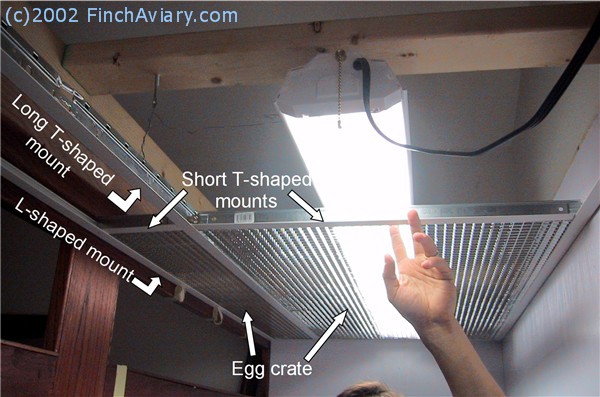
decided to build the ceiling using ceiling panel mounts
and egg crates. Egg crates are plastic grids with 1/2"
square openings that can be found in your home improvement
store's lighting installation department. The grids can
be silver or white. I prefer white, but white was not
available at the time we were shopping for supplies, so
I used silver instead. We were going to use prismatic
acrylic transparent sheets instead of the egg crates,
but our initial tests of this material showed that it
was a little flimsy (at least with the acrylic piece we
purchased from Home Depot). My fear was that the button
quail might actually hit the ceiling, causing the flimsy
panels to fall out and break, potentially hurting the
birds in the process. We found that the egg crate was
much firmer and not at all likely to fall from the ceiling
panel mounts. Using egg crates also meant that the full-spectrum
light passes through the ceiling unfiltered by plastic
or glass of any sort.
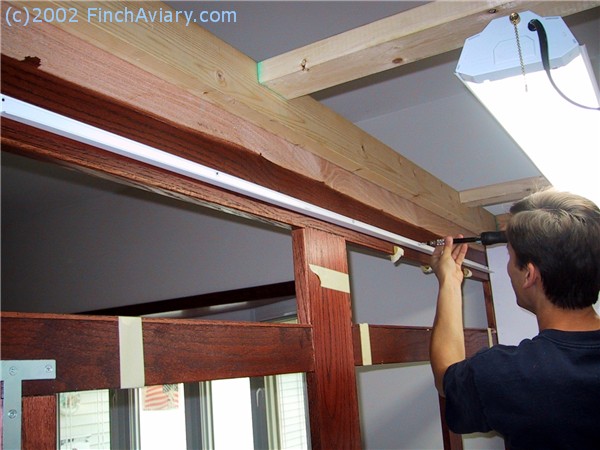
To
install the ceiling, we first used the L-shaped ceiling
mounts. We screwed these to the walls on all sides, ensuring
that they were mounted level and that all screws on the
back and sides were inserted through the paneling and
into the 2x4 studs that made up the aviary frame. (Remember,
click on any image to enlarge.)
|
|
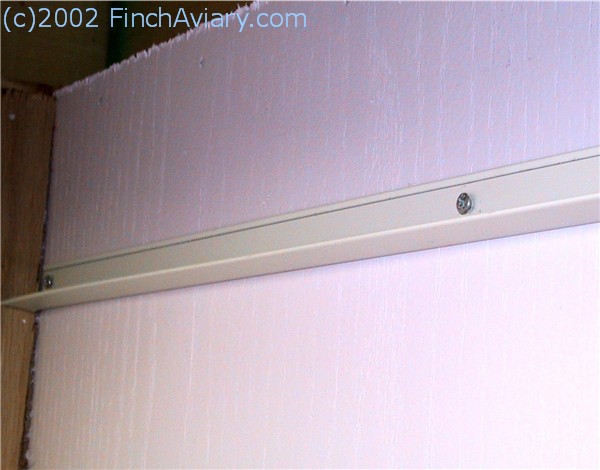
L-shaped
ceiling mount screwed to inside of aviary front. |
|
|
L-shaped
ceiling mount screwed to aviary back wall. Screws
were positioned at the 2x4 studs in the aviary frame.
|
|
|
L-shaped
ceiling mounts on all sides. We tested at several
locations to make sure all L-mounts were level. |
Because
the aviary was wider than the width of an egg crate grid,
we needed to add an additional mount across the aviary,
the distance of one egg crate width from the back wall.
A T-shaped mount was used for this purpose. The T-shaped
mounts are designed such that 2 or more can be joined
together if longer distances are needed. The T-shaped
mount was cut at each end to fit the length of the aviary
(note that we made sure to cut the T-shaped mount at a
connector slot on the end that we were starting on, to
guarantee there would be another connector slot at exactly
one egg crate length away from the wall).
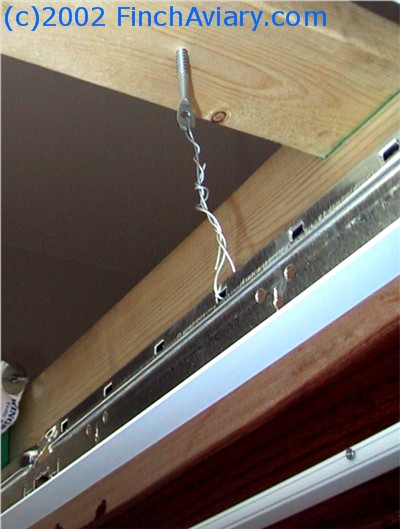
The
long T-shaped mount was joined to the L-shaped mount at
each side of the aviary with a screw. To provide additional
support for this very long T-shaped mount, we used hanging
screws and hanging wire. The hanging screws were screwed
into the 2x4s in the frame ceiling. Hanging wire was attached
to the loop in the hanging screw and then attached to
the T-shaped mounts via slots cut into the mount for this
purpose. Once again, we ensured that the mount was hung
level.
|
|
Hanging
screws were attached to the 2x4 supports in the ceiling
frame. Hanging wire suspended the T-shaped mount from
the hanging screws. Again, it was important to ensure
this mount was hung level. |
|
T-shaped
mount. Note the holes for the hanging wire and the
slots for connecting additional T-shaped mounts
vertically
|
Next,
a short T-shaped mount as long as the width of one egg
crate was attached from the long T-shaped mount to the
L-shaped mount at the back wall. This piece was attached
to the T-shaped mount via slots that exist in the long
T-shape mount for this purpose. It was attached to the
L-shaped mount view a screw. It was positioned exactly
one egg crate length from the side wall. This created
a framed rectangle the size of one egg crate in the back
corner of the aviary. An egg crate was then set into the
frame, supported on all sides by the mounts.
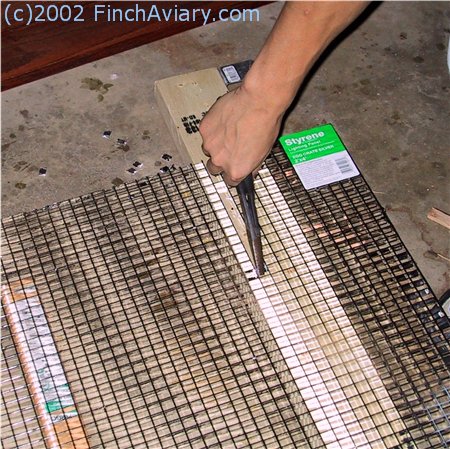
An
even shorter T-shaped mount was connected from the long
T-shaped mount (at the same point as the last piece was
connected) to the front of the aviary, creating another
rectangle that was the length of an egg crate but only
a fraction of the width. An egg crate was cut to fit this
rectangle, using a pliers to twist out the grid prongs
along the border of the piece we needed. This piece of
egg crate was then set into the mounted frame.
|
The
L- and T-shaped mounts combine to form rectangles
into which egg crate could be set.
|
|
|
The
egg crate could be cut to fit smaller spaces by using
a pliers to twist the prongs out along the border
of the desired rectangle. |
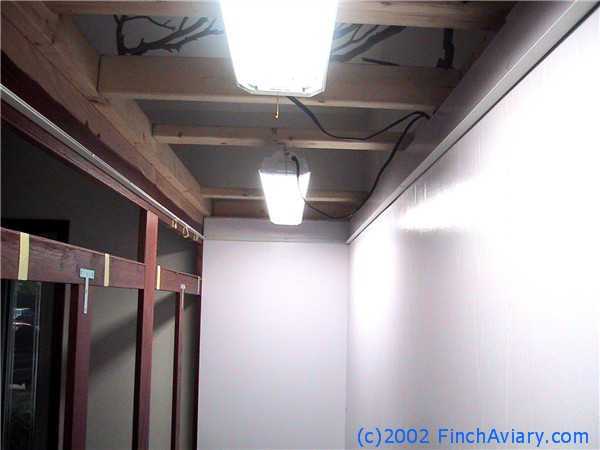
The
above method was repeated all the way across the aviary.
The end result was a sturdy framed egg crate ceiling.
The full-spectrum lights were still accessible through
the bottom by lifting and sliding the egg crates over.
(The lights are also accessible through the top (without
disturbing the birds inside), by swinging the shop lamp
fixtures up).
|
Lying
on the aviary floor looking up at the finished ceiling.
|
|