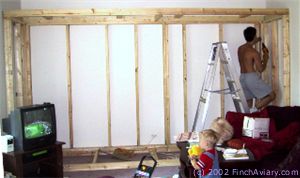
|
|
The
Structural Frame
Once
the birds were all safely housed downstairs in the temporary
aviary, we were ready to begin work on the new aviary. The first
thing to be done was to build the aviary's skeleton - it's structural
frame - which would define the boundaries of the aviary and
provide it's support. Because of the massive size of the aviary,
the structural frame was very important - it must ensure it
can support the structure, including the light fixtures and
ceiling. Because the front of the aviary would be mostly open,
the three remaining sides, floor, and ceiling must be extra
sturdy to support the weight.
The
structural frame was built primarily from 2x4s. 2x4s offer a
solid construction that is easy to work with and economical
too. The drawback to using 2x4s is that they are not pretty.
However, because 3 sides of the aviary would be hidden by the
walls of our living room, the aviary could be constructed such
that the inside panels and the finished outside front hide the
2x4's from view. Had we been building an aviary that could be
viewed from 3 or 4 sides, we probably would have chosen another
design.`1
We
chose untreated pine over treated pine because we did not want
to expose the birds to any of the chemicals used to treat the
wood (and kill insects). Because the aviary is indoors, the
threat from insects is minimal. We chose pine over cedar because,
of the two, pine is less aromatic. The aroma from cedar (especially
when it gets wet) can cause respiratory problems in birds (not
that we expect the structure to get wet, but better safe than
sorry).
| Frame
Base |
|

The
first of two base panels that would become
the floor.
The panels were constructed of plywood and
held together
with screws (or in some cases, nails).
|
|
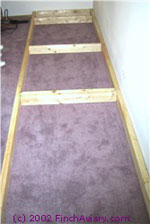 Two
base panels were screwed together to span
the entire length of the wall. (Note: more
support beams were added later so that the
floor would be able to support my weight,
should I need to step inside.
 |
|
Tom began building the frame (following the dimensions of
my design), by building rectangular sections in our garage.
The base was built from two such sections. Each section
was built using screws (or in a few cases, nails) to attach
the 2x4s in a rectangular shape. Screws are preferred over
nails because they provide a stronger, tighter, more durable
connection than do nails. However, there are some locations
in which it is just not practical to use a screw, and in
those cases, nails were used instead. Cross beam supports
were added to make the structure base sturdy and ensure
it would support my weight, should I need to step inside
the aviary. The two rectangular sections that would make
up the base were then moved into position in the living
room and attached together using screws. |
| Frame
Walls |
|
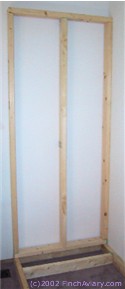
Wall
panels were constructed in the same fashion
as the base panels, then attached to the base
and each other with screws.
|
|
| |
 The
frame with the base and all wall panels attached
(Click to enlarge)
 |
|
| |
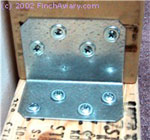 Screws
were the preferred method of attaching the
2x4s, but when this was not feasible, brackets
like the one shown left were used.
|
|
Wall sections were added next. Some were built in the
garage, then moved and attached to the base in the Living
Room. Others (where a tight fit was necessary) were built
in place. The wall sections were screwed directly to the
base when possible. When it was not possible because there
was no ideal place to position screws, metal braces were
used to attach wall sections to the base.
Once
again, vertical crossbeams were used liberally to give
the structure as much strength as possible and to make
sure there would be plenty of places to nail the interior
paneling to when the time came. Because we knew the walls
would eventually be built with panels that were 4 ft wide,
we ensured there were vertical crossbeams where each panel
wall would meet.
|
| Frame
Ceiling |
|

Finally,
the ceiling panel was placed on top of the
frame
and screwed into place.
|
|
| |
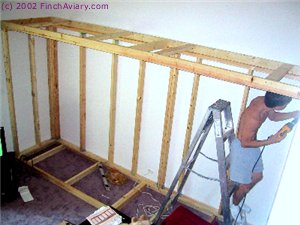 The
ceiling was constructed as one very long panel.
Placing
it on top was a tight fit (and a heavy lift). |
|
| |
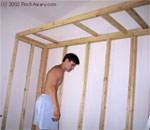 Crossbeams
in the ceiling helped support the structure
and
provided mounting places for the fluorescent
light fixtures. |
|
Finally, the ceiling frame was built. This section was
constructed as one solid panel stretching the entire length
of the aviary (rather than two panels, each half the length)
because we felt it would be sturdier (considering there
would be no beams in the front of the aviary to support
it -- the finished front, however, would offer some structural
support). This required the use of two extra long (14
foot) 2x4's. This panel also was built with crossbeam
supports, along with crossbeams that would be used to
support the light fixtures. The ceiling panel was placed
on top of the aviary frame (no small feat! It was heavy
and a tight fit!) and screwed into place.
A
final beam was screwed into place, supporting the ceiling
panel in the front. This beam was located in the front
of the aviary, about halfway across the length, and ran
from the bottom to the top. It was only temporary, adding
support for the ceiling until the front could be installed.
Once
this was done, the structure was quite stable. There was
only a little wiggle in it, and only if you really jerked
on it hard. We knew this would not be an issue, since
the walls, floor, and aviary front would all add even
more structural stability. No one and nothing would be
able to topple this aviary.
|
Click
Previous to return to the Temporary Aviary Page | Click Next
to read about the Aviary Light Fixtures
PREVIOUS
 |
|  NEXT
NEXT
 TOP TOP
|
|
|
|
Supplies
|
2x4s
- untreated pine
|
$72.54 |
|
3"
nails
|
|
|
3"
screws
|
|
| metal
brackets |
|
|
|
| |
|
Remember,
click on any photo to enlarge!
|
|
|
